Saturday, December 18, 2010

Señor Brew™'s Christmas Wish List


Señor Brew™  has put together a Christmas wish list of things he wants to implement in the Noble Square Brewery this coming year.  He doesn't expect Santa's little helpers pictured above (or anybody else for that matter) to actually gift these things, they'll be stuff that he buys or builds himself:

New 20 gallon brew pot--since he is brewing less often, brewing a larger quantity at one time is ideal.   Upping the kettle to 20 gallons will allow him to do full 15 gallon batches without worry of boilover.  Señor Brew™ can then convert the current 15 gallon kettle to the HLT, and convert the 15.5 gallon keggle that is currently the HLT to a mash tun.

That means he needs to build a 3 tiered stand to safely hold these larger components, or a 2 tiered stand and pump.  A stand is already necessary, we have to figure out how to incorporate the new natural gas burner that is up and running.  With a pump, we'll also be able to use a Therminator style plate chiller, so we'll add that as well.  (This is a WISH list after all--Señor Brew™ will be happy if we get a third of these upgrades implemented this year.)

How about some easily implemented improvements that we should have already had for a long time now?  Like bubble wrap insulation for the HLT (instead of covering it with the grill cover, like we currently do).  If we convert the keggle to a mash tun, we'll need a false bottom for it.  There's an old one lying around the Noble Square Brewery somewhere--it was used in the old days when we mashed in a 5 gallon igloo cooler.

I'm sure there are other upgrades Señor Brew™ would like to implement, but that's a pretty good wish list for right now.  We don't want Santa to think he's greedy and put him on the naughty list.  Although speaking of naughty, he wouldn't mind if Santa's helpers stopped by Christmas eve for some Christmas brew and cookies.

Friday, December 10, 2010

Now That's A Fire!

I hooked my 32 nozzle burner up just to do a non-brewing test of it.  It seems to work fine as you can see from the photo above, or the video below.  I used some fittings to reduce the 3/4" burner inlet down to 3/8", which is the size of the flexible gas hose.  I'm going to have to take them apart and reconnect them because I used standard teflon tape which is not supposed to be used for gas line.  I have since discovered the error of my ways and bought some tape specifically for gas.  Safety first!


Now I need to build a stand.

Sunday, November 28, 2010

Now We're Cooking With Gas!

I have natural gas piped out to the balcony at Noble Square Brewing's new location.  I thought I would take advantage of the fact and get a natural gas burner to brew on.  No more dealing with the hassles of propane tanks--swapping it out from the grill, running out in the middle of a boil, making trips to get it filled.  (I no longer have backup tanks since the move--professional movers will not move tanks, even if they're completely empty.)

Above is a photo of the wok burner I ordered awhile back.  It has 32 tips and supposedly generates 160,000 BTUs/Hr in heat--that's Megan Fox hot!  Now I just have to find the time to hook it up, and figure how I'm going to mount it on a stand. 

Here's a couple closeups of the tips:


Sunday, November 7, 2010

Pseudo Alt and base for Holiday Brew today

I was able to get a brew session in today.  I just used what I had on hand, including a starter of American Ale yeast that I started a couple of weeks ago.  I did a split batch, which I'm going to call a Pseudo-Alt and the base for my Holiday Brew.  The Holiday Brew is normally a strong dark lager with special ingredients, but since I'm so late starting it, this year it's going to be a stronger than average dark ale with special ingredients.

Here's the recipe(s):

Grain bill

4 lbs light munich
6 lbs dark munich
13 lbs pale malt
1 lb cara munich (it's 120L)
1 lb cara vienna

I mashed for an hour, single infusion at 147F.  I took the 1st and 3rd runnings for the pseudo-alt, and the second for the base of the holiday brew.

Here's the boil/ hop schedule for each batch:

Psuedo Alt (about 11.5 gallons pre boil):
1 hour boil
1.4 oz Magnum 10.4% AA 50 minutes
1 oz Hallertau 3.0% AA 20 minutes

collected about 10 gallons of wort 1.054 OG (left behind maybe a half a gallon with the trub)

Holiday Brew Base (about 3.5 gallons pre boil)
100 minute boil
1 oz Halletauer 3.0% AA 100 minutes
1 oz Hallertaur 3.05 AA 0 minutes

collected about 2.75 gallons of wort 1.054 OG

I plan to add some agave syrup, dried cranberries, and vanilla to the secondary on this one.  The boil wasn't supposed to go that long, but we went a long family walk while it was brewing, and the next thing you know, it was an hour and forty minutes later.  It was a beautiful evening, with an amazing evening sky.  The photo above is of the sky just after sunset.  The picture doesn't do it justice, it was taken on the Blackberry.

Both batches were pitched on the slurry from the starter of American Ale yeast.  Fermentation started almost right away--the yeast was still active in the starter.

Sunday, October 17, 2010

Jacuzzi Jet Ice Bath Chiller!

I realize that I haven't posted for quite awhile, so I thought I would post a short brewing video I took while brewing the split batch Belgian Dubbel/ Pale ale. I've read that a picture is worth a thousand words, so a video should make up for the two months since I last posted.

I chilled the dubbel which was the bigger part of the split batch with my immersion chiller.  But for the smaller part, the pale ale, I decided to do an ice bath.  Not just any ice bath, but a jacuzzi ice bath.  Yes, I filled the jacuzzi tub with ice water and turned on the jets.  I wouldn't suggest doing this while SWMBO (She Who Must Be Obeyed) is home:


Saturday, August 21, 2010

Yay! I had time to brew!

The wifey and the little one were out of town visiting the grandparents, so I had some time for a brew day a couple of weekends ago. I did a split batch, a Belgian Dubbel and a pale ale. Details to follow soon, I hope. Including the results of the jacuzzi tub chiller experiment.

Saturday, July 10, 2010

Cheap Digital Temperature Controllers

Just recently a fellow blogging homebrewer posted an entry about his use of a Lux outlet thermostat as a temperature controller--he's using his to turn on a heater when it gets too cold to ferment.  These outlet thermostats work by turning on power to your heating or cooling device when the temperature is below or above what you have the thermostat set to.   You plug the thermostat into the wall outlet, and your heating or cooling device into the thermostat. They cost about half of what the Johnson controls that many homebrewers use for temperature control.  I have been using  two of these for a couple of years now, to control both my fermentation fridge, and my converted freezer chest kegerator/lagering chamber.  I'm surprised I haven't already written about them, but since Mark Taylor at the Backyard Brewer started the ball rolling with his post, I thought I would follow up with one of my own.

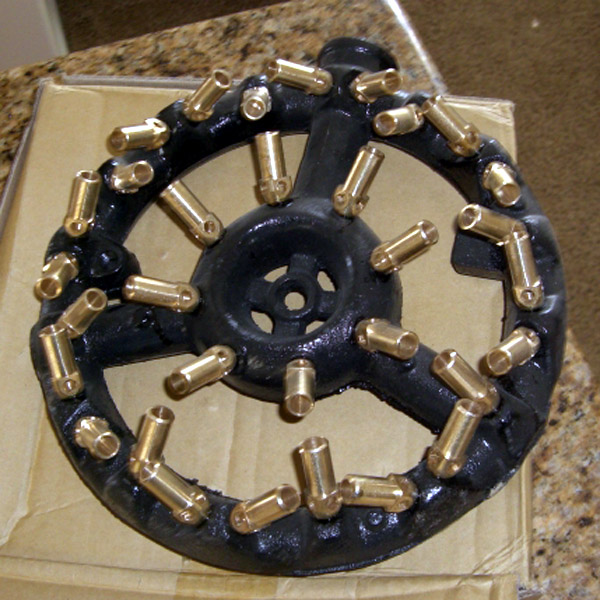
I modified both of them, because out-of-the-box, they didn't do exactly what I wanted them to.  First of all, as you can see from the photo above, the sensor wire built into them is only a few inches long, meaning you can only sense the temperature right next to the outlet.  Since I wanted to use them to control temps inside a fridge or freezer, this meant that I had to run an extension cord to the thermostat, which I would then place inside the fridge, and then plug the fridge cord into the thermostat.  The fridge cord would have to run to the outside of the fridge, where it was hard-wired in.  You could use it this way, which I did for awhile, but I realized it wasn't optimal to have a heavy duty extension cord running into the fridge, and also to have the thermostat outlet inside the fridge, operating in a cold, damp environment. 

Before I explain how I modified these thermostats, be aware that any modification will void the warranty.  Also, be sure to make sure that thermostat is unplugged, and the battery is removed before doing any work on the thermostat.  Señor Brew™ is not suggesting that you make any changes to your thermostat, nor is he responsible if you break your thermostat, or electrocute yourself or the cat or set your house on fire, or any other unfortunate event that may occur during or because of modifications you may make to your outlet thermostat.

So I added a length of cord to the sensor wire.  This was easily accomplished by cutting the sensor cord, attaching some lamp wire, and reattaching the sensor to the other end of the lamp wire.  Now, I could eliminate the extension cord, and just run the sensor wire from the outlet thermostat into the fridge.

Thermostat with sensor wires cut.


Sensor cut off


Lamp cord ends stripped


Heat shrink connectors at thermostat


Heat shrink connectors at sensor


Secondly, I wanted to use the modified freezer chest to lager my lagers, at least when I wasn't using it to serve beers.  Ideally, I wanted to set it to just above freezing, to lager my beers as cold as possible.  The problem here was that the outlet thermostats lower range was 45F.  I did find that there was an adjustment factor you could program in, adjusting the temperature plus or minus 5F.  Meaning, if you adjusted it down all the way, the thermostat would read 45F when it was actually 40F.  Of course this still wasn't good enough for me, so I decided to swap out the sensor.

I contacted an engineer at Lux via email to ask them what type of sensor was in the thermostat currently.  It turns out that it's a thermistor.  I don't have the original email, but I remember that it was an NTC thermistor, and I believe it was 50k ohms.  NTC stands for Negative Temperature Coefficient, meaning that resistance decreased at higher temperatures.  (This is opposite of how metals react, which is why computers run better when they are cold, there is less resistance in the copper circuits within them).   I did the math, and realized that if I swapped in a 30k ohm thermistor, my thermostat would think it was 20 degrees Fahrenheit warmer than it truly was.  Meaning that I could set the thermostat to 53 degrees Fahrenheit, and it would continue to run the freezer until it was actually 33F.  (Incidentally, if you wanted to use this controller to heat something outside its upper range of 95F, you could swap in a higher resistance thermistor, so the thermostat would read a temperature lower than the true temperature).

Instead of cutting the sensor cord, as I did with the other thermostat, I simply opened the thermostat, removed the sensor cord and all, and swapped in another lamp cord with my 30k ohm thermistor soldered into the other end of it.

Lamp cord connected inside thermostat


30k ohm thermistor purchased from Allied Electric


New thermistor soldered in and covered with rubber

Friday, June 18, 2010

It's a Girl!


Yes, Señor Brew™ is a proud papa! As you can see, from the bottle label above, Tesla Marie was born 2 days ago. She and her mother are both healthy and happy.

Of course, being a homebrewer, I brewed a big batch of ale in anticipation--something I could give out instead of cigars. I wanted something that was flavorful, but would appeal to a wide range of people. I decided to go with a full flavored, yet lighter-bodied blonde ale. The recipe is below with notes:

Tesla Marie Honey Blonde Ale (12 gallons)

Water
1/3 Redondo Beach Well Water (treated with campden tab to neutralize chloramine)
2/3 Reverse Osmosis Water
Gypsum added to mash to lower pH

Grains
10.5 lbs pale malt (base malt)
4 lbs vienna malt (for extra malty-biscuity flavor)
4 llbs rice (to lighten the body in compensation for the vienna malt)
3 lbs honey (for complexity of flavor, and also to lighten the body)

Mash Schedule (step mash, with cereal (rice) mash addition to raise temp)

143F for 20 minutes
boiling rice was then added to raise temp to
154F for 4 hours (due to break taken to tour the hospital where Tesla would be born)

Hop Additions during 60 minute boil

1.8 oz Magnum 10.3% AA 60 min (bittering--wanted a slightly bitter beer)
0.5 oz Williamette 15 min (flavoring--adds a bit of earthiness)
0.5 oz Hallertau 15 min (flavoring--noble hop, reflects her German heritage)
0.5 oz Williamette 0 min (aroma)
0.5 oz Hallertau 0 min (aroma)

OG 1.058 F.G. 1.010


ABV 6.3% (pretty strong for a blonde, due to honey addition)

Yeast Wyeast 1272 (adds a touch of fruitiness to the fermentation)

fermented primary 13 days at 68F
secondary 7 days at 70F
cold conditioned and force carbonated in keg 7 days at 45
bottled from keg with counterpressure filler

Monday, May 24, 2010

Ahhh...Screw It!


Yes, screw it. As in screw-top bottles. I'm building up my collection of empty bottles because I'm going to bottle my first brew in the Redondo Beach brewery instead of kegging it. We had a little shindig here, a housewarming party if you will, and I bought an assortment of beers for the guests. I thought I could save the bottles and use them to bottle the first brew.

Well, I thought wrong. It turns out some of the craft/import beers I bought use screw top bottles. Screw tops are not recommended for bottling homebrew because of breakage and sealing issues. So now I'm screwed. Well not really. I'll just recycle the screw top bottles and build up my stash some other way.

Just as a point of reference, so I don't buy them again, at least when I'm short on bottles:

Wingwalker
Tecate

I'll add to this list as I run across more. Of course I'm not even going to list BudMillerCoors, because all their bottles are screw tops. Ahhhh...Screw It!

Tuesday, May 11, 2010

Redondo Beach Water Update

It looks like I wasn't looking at the full report, viewable here as a PDF, which does have most of the information necessary to brew. The only data point missing, alkalinity as expressed by ppm of CaCO3, was provided by Jackie, my helpful California Water Supply water quality specialist.

So here is the relevant data on Redondo Beach groundwater (ppm):
  • Calcium: 150
  • Magnesium 38
  • Alkalinity 153
  • Sodium 120
  • Chloride 348
  • Sulfate 150
According to the CWS website, the high Sodium and Chloride levels come from seawater influences. Seawater is salty? And it influences the groundwater supply in a beach town? Who would have guessed?

Sunday, May 9, 2010

Water, water, everywhere...


So now that Noble Square Brewing is in a new location, we have to take in consideration our new environment. And for brewing beer, that means water. Señor Brew™ checked out the California Water Service Company's website to see what the water chemistry in Redondo Beach looked like.

The report on the site says our water is a mix of groundwater and purchased surface water, and gives different readings for each. Unfortunately, it doesn't say what the mix is, and doesn't say if it changes throughout the year. Luckily, the Noble Square Brewery is now located right next door to a well, and the storage tanks for the well (pictured in the title photo for this post). The water guys stop by next door regularly, and Señor Brew™ was able to confirm that my water is always 100% groundwater, except for the rare occasions that the well is shut down.

Unfortunately, there are a number of "not applicables" listed for important chemical components of the groundwater, such as calcium. Señor Brew™ has been playing phone tag with a water quality specialist for CWS, and has yet to determine what the chemical composition of our water is. Once we find out, we'll post it here, so other brewers in Redondo/Hermosa Beach that are on groundwater don't have to jump through hoops to find out, like Señor Brew™ has.

One thing we are able to determine from the site is that we are super high in chlorides, with an average count of just under 350 parts per million. It looks like we're going to have to purchase water that is free of chlorides, and dilute the tap water to get that count down. It also looks like we're going to have to treat the water to get rid of the chloramine used to sanitize it.

Thursday, May 6, 2010

Noble Square Brewing is Back!

Yes, after a five month hiatus, Noble Square Brewing, the blog and the home brewery is back. I apologize to all the dedicated readers (I think we were up in the double digits), but as often is the case, life intruded on brewing and blogging about brewing.

While I was gone, it appears that blog became an interesting place for some of our Asian readers to post comments. (I'm going to clean those up, once I remember how--I have a feeling they contain links to sites you don't want to visit).

So what happened? Why did Señor Brew™, and Noble Square brewing take the hiatus in the first place? Well, a whole lotta stuff happened:

  1. New Baby on the way-- My wife, who you may have seen in such ads for my brews such as Red on Head, is 7 months pregnant. This will be our first child, and I'm already a super proud papa. She's due on Father's Day, June 20th, so if the baby arrives on time or early, I'm going to have the best Father's Day present ever.

  2. New Job--I switched careers to a related field, but it's still a big change, and I'm now a rookie in the new job after being a veteran in the old. I feel like I know what I'm doing about 90% of the time, which is way better than how I felt a few short months ago.

  3. New City--Yes, Noble Square Brewing has pulled up roots from the Noble Square neighborhood of Chicago to move all the way across the country to lovely Redondo Beach, California. No, we are not changing the name to Redondo Beach Brewing, for a couple of reasons. One, the name is already taken. Two, we're staying true to our roots, and remembering where it all started. I have changed the "Is it brewing weather?" section in the sidebar to reflect the new location, and the logo might change. Stay tuned.

With all of these changes going on, I don't know how often I'll be brewing in the future. I do know that I'll try to post here at least once a week, and I do intend to get have a brew ready by the due date so I can give it out instead of cigars. Thank you if you were still following this blog in the hopes that it would be resurrected. Noble Square Brewing is back.